Constrocare
  • Home
  • About Us
  • Products
    • Terrace Waterproofing
    • Exterior Waterproofing
    • Admixtures
    • Sealants
    • Tile Grouts
    • Tile & Stone Adhesives
    • Tile & Stone Care
    • RCC Repairs
    • Grouts
    • Rising Dampness
    • Tools and Machinery
  • Services
  • Brochures
  • How To
    • RCC Repair?
    • Use Cement Tile Grout?
    • Use Dr. Fixit Raincoat?
    • Use Dr. Fixit Roofseal ?
    • Use Dr. Fixit Pidifin 2K?
  • Do-it-Yourself
    • Sealing
    • Gap Filling
    • No More Nails
    • Grout Refurbishing
  • Contact Us

No More Nails

What do you do when you need to fix your bathroom accessories or mirror on the wall? And what do you do if a tile cracks or you hit a pipe? Maybe your landlord has forbidden drilling in the bathroom? That's exactly why we have quick setting adhesives for all types of surfaces from smooth high-gloss tiles to rough natural stone to mount all your accessories without the need of drilling.

Here's a step-by-step guide to solve your drilling problem:
Picture
Step 1: Make sure the surface to adhere is free of any dust or dirt. Place your object on the area you want to fix it and using a masking tape or some form of marking, accurately mark the position.

Picture
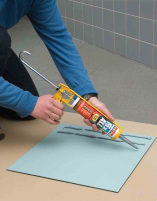
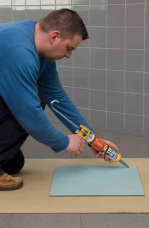
Step 2: Prepare your McCoy Soudal Fix All High Tack sealant tube or similar and test it after placing it in the gun. Apply beads of the sealant on the back of the object you want to stick  

Picture
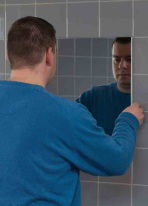
Step 3: Place the object on the marking you have done in Step 1 above. Press tight for 1-2 second before releasing. 
That's it!

To understand further or purchase any material, please get in touch here: 
Enquire Now
Powered by Create your own unique website with customizable templates.